Sea Glass Bowl Craft Beach Craft How To

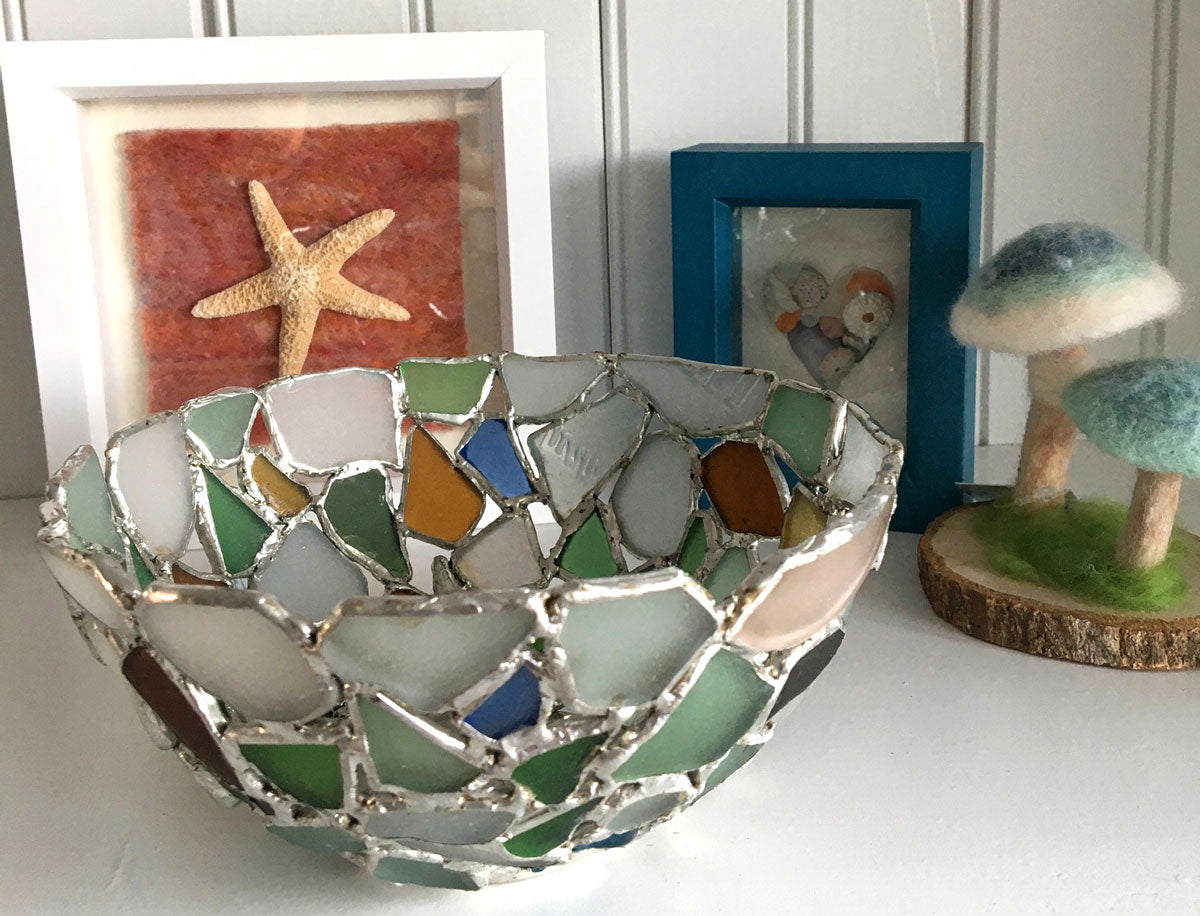
I have long admired these types of bowls and lampshades I have seen other artisans make. Seeing the high price tags, I thought, “How hard can it be?” All crafters’ famous last words! Making a bowl like this is not easy and takes more time than I ever thought it would. At the top of my list of supplies is time and patience. But the results are worth it.
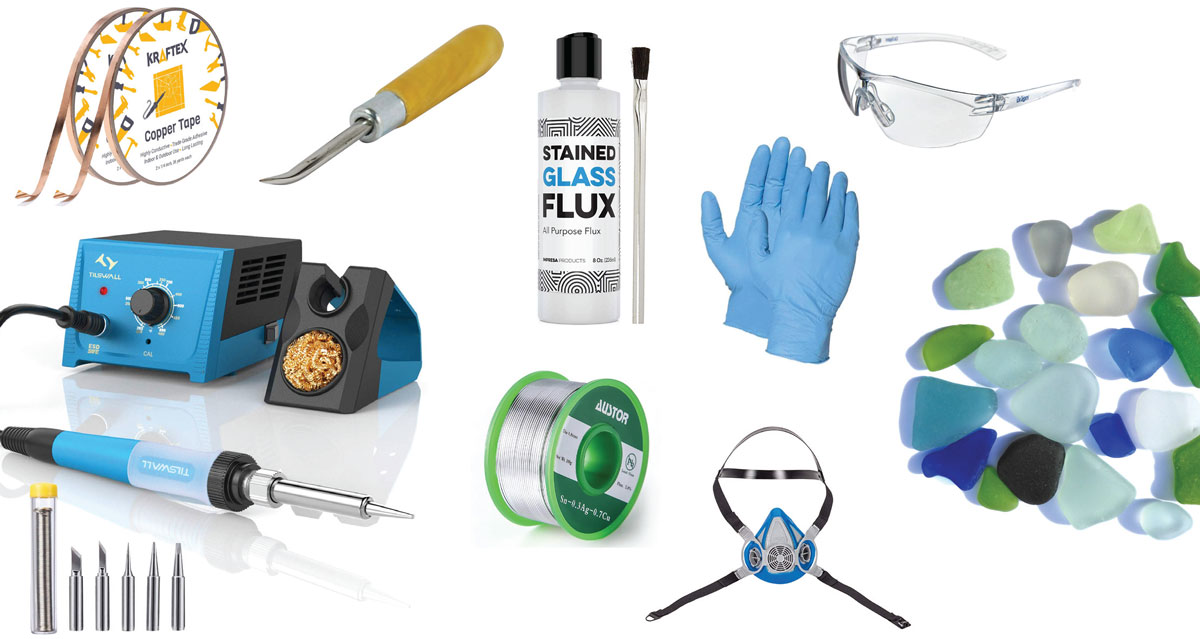
Supplies:
- Sea glass—plenty of it! Around 100 flat pieces.
- Copper foil tape 1/4-inch wide
- Burnishing tool
- Electric soldering tool. I have a Tilswall Solder Station with several tips, iron holder, and cleaning station.
- Liquid flux and a brush to apply the flux
- Solder. I use lead-free solder, but you can choose to use a lead/tin mix if you’d like.
- Latex gloves
- Face mask (for particulates and fumes) and safety glasses. I have a full face mask that I use for this and other more toxic crafts.
- Optional: A clamp tool to hold the glass while soldering, so you do not burn your fingers on the hot glass. I started with this tool and discontinued using it as I gained experience working with the materials.
Prepare your glass:
1. Your glass should be clean and free from dirt and oils. I wash mine in Dawn, and after it is dry, I wipe it with rubbing alcohol. I wear gloves when I do this so as to not get oils from my hands on the glass. If the glass isn’t clean and dry, the copper foil tape will not stick properly and will come apart later.
Wrap glass edges in copper foil:
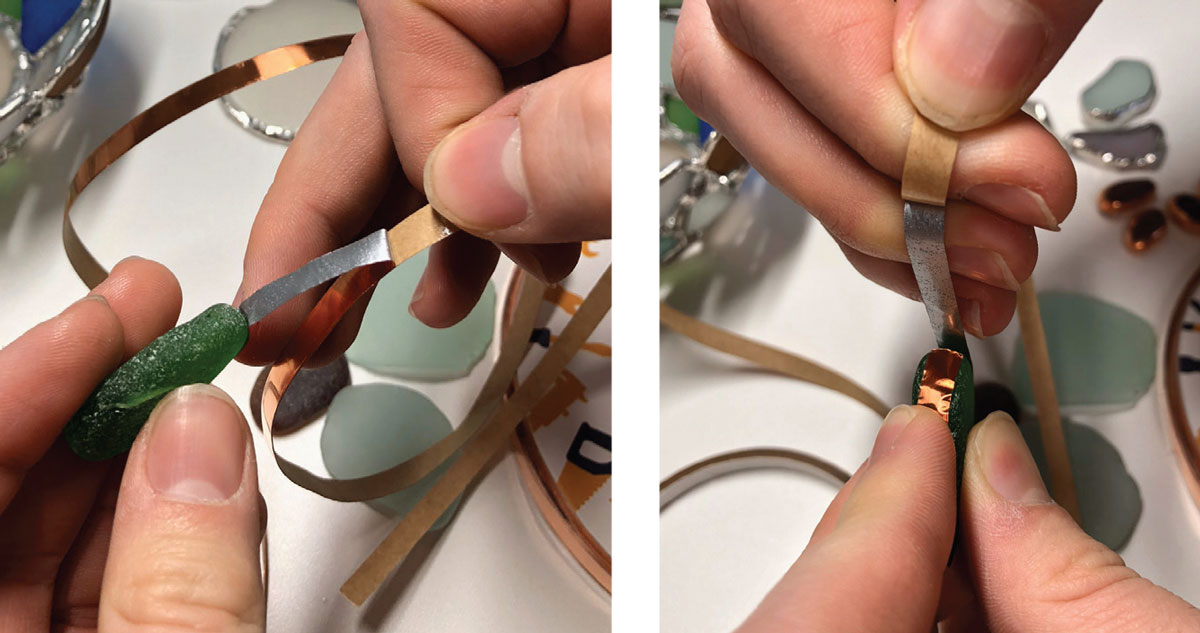
2. Solder will adhere to copper, not glass, so you need to cover the edges in copper foil tape. Apply copper foil tape around the edges of the glass and overlap the tape about an eighth of an inch at the ends. Be sure to line the edges of the tape up at each end so that when you solder it, the pieces will look good.
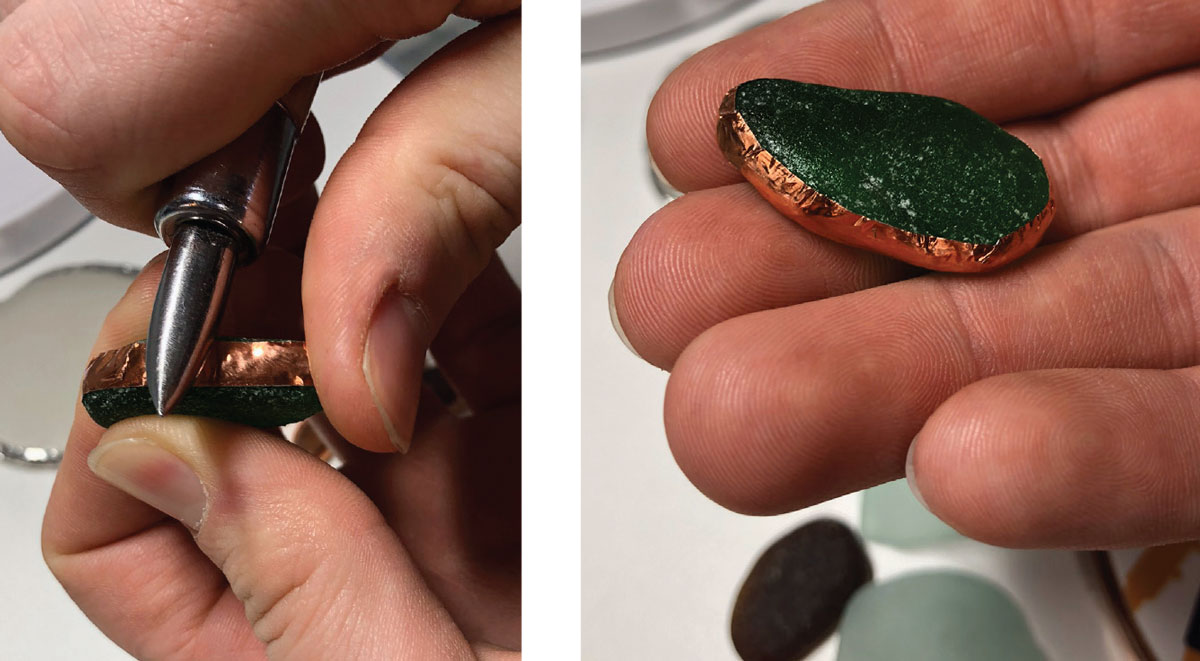
3. With your burnishing tool, rub the tape and stick it down to the glass and smooth it out as best you can. Wrap about 100 or so pieces of glass so that you have enough pieces to choose from when it is time to assemble it. It will be like a puzzle so the more pieces you have, the easier it will be to find the right fit.
4. Once you have taped all your pieces, wipe them with a clean cloth to remove any dirt. Solder does not stick to dirt.
Tinning the glass:
5. Tinning means applying a thin layer of solder to the tape. It is much easier to evenly coat the pieces while they are loose than to apply the solder during assembly. This is the time to wear your gloves and mask and eye protection. I heat my soldering iron to about 425°F (the 800 setting on my kit) and I use my flat tip.
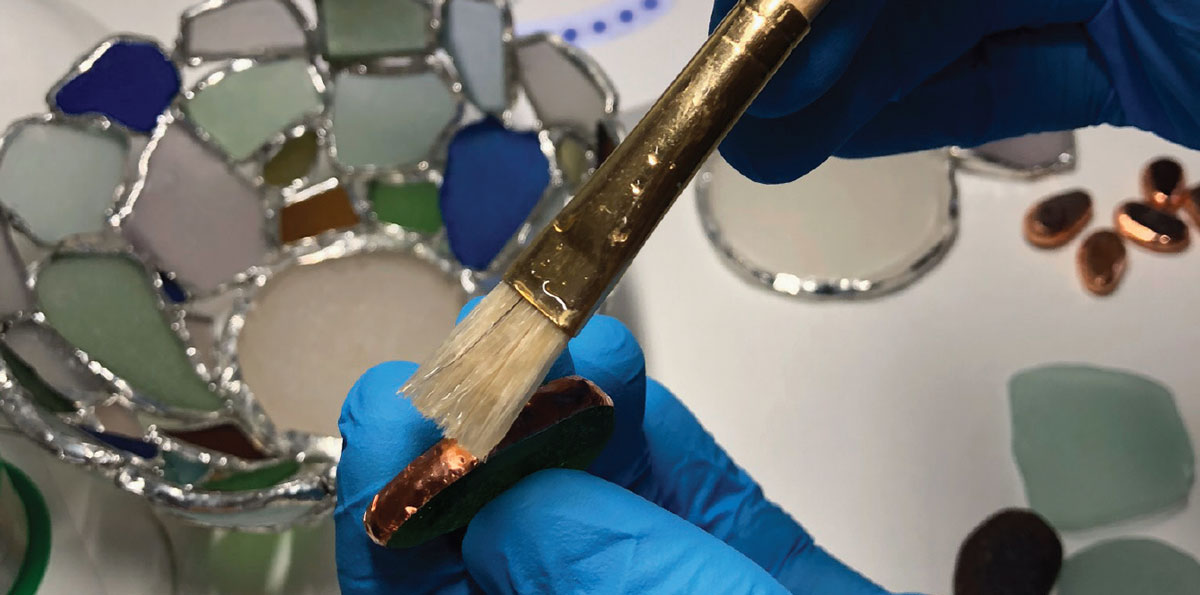
6. With the brush, apply flux to the copper tape wrapped on the sea glass.
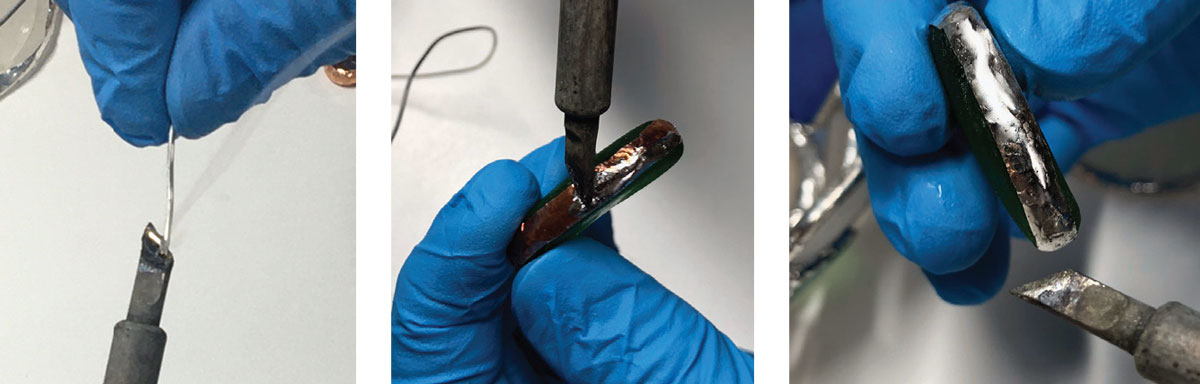
7. Apply solder to the iron. Then quickly run the iron around the tape and cover all the tape, turning it silver in the process. I say quickly because the glass quickly gets very hot and you can burn your fingers. Add more solder as needed until you have an even coating of silver-colored solder. You can use a clamp to hold the glass until you are able to perform this step quickly so you don’t get burned by the hot glass.
8. When you are done tinning all your pieces, wash each piece one by one in soapy water, drying them immediately.
Forming the bowl
9. Find a bowl to use as a form; one without a lip works best. Start with a small bowl if this is your first time soldering.
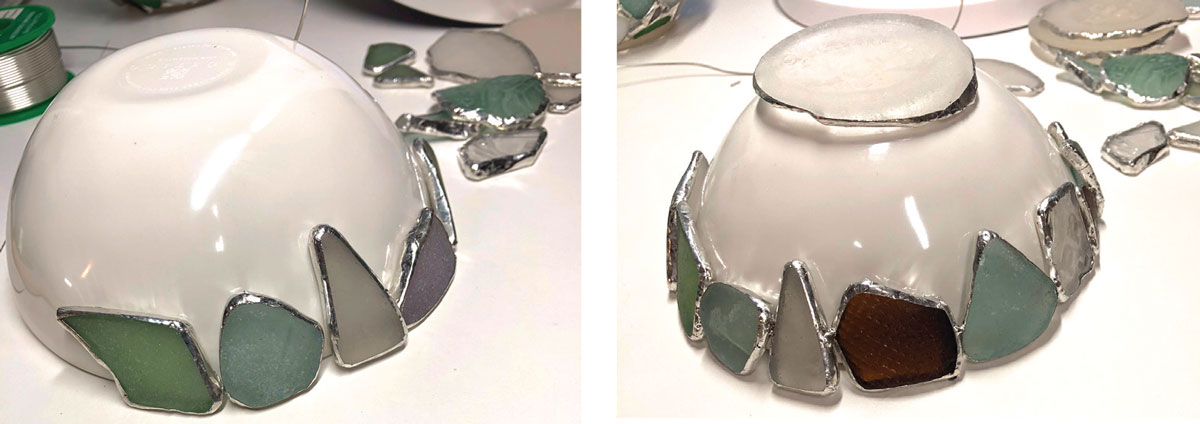
10. Turn the bowl upside down on your work surface. Line the pieces up against the form and solder them together in one spot so they are tacked together, forming the rim of your bowl.
11. Once you have made a ring around the bowl, find a piece to be the bottom of the bowl. Something that will sit relatively flat.

12. Connect the base to the rim of the bowl by adding new sea glass pieces and tacking them together with solder. Alternate sides of the bowl until the base and the rim are connected in four places. Then fill in the remaining
voids by finding the right “puzzle pieces.”
It’s perfectly fine to have small gaps.
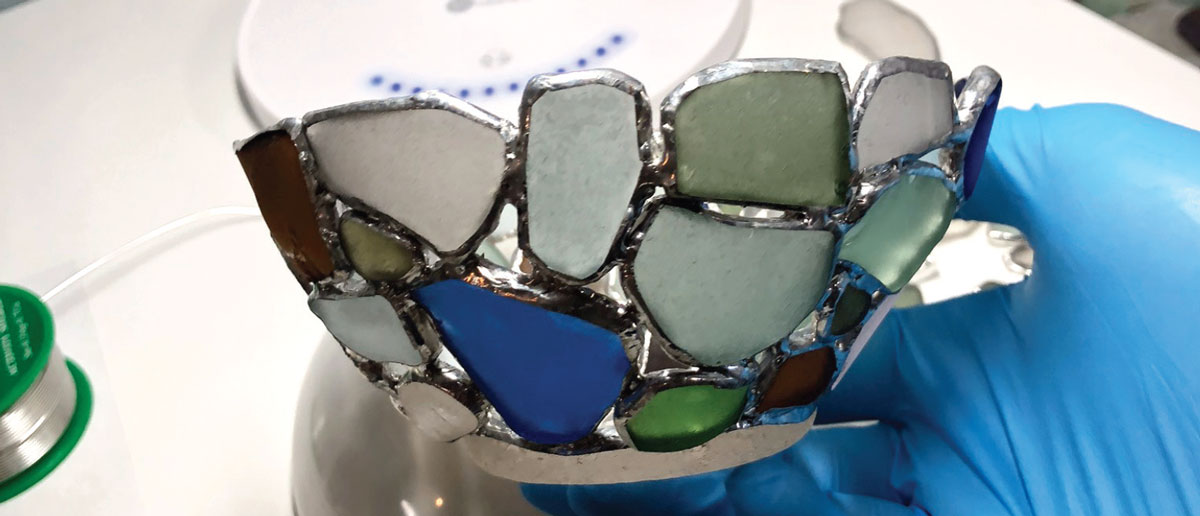
13. When the whole bowl is complete, go back with the solder and fill in the gaps to strengthen the bowl.
Tips
- More flux is better than less flux. If the solder isn’t flowing the way you want, you probably need to reapply more flux.
- Keep the sea glass, foil, solder, and soldering iron clean.
- This bowl is not food-safe.
- Read instructions for all equipment.
This article appeared in the Beachcombing Magazine May/June 2020 issue.
Make art with your beach finds

Learn how to make art, jewelry, and fun home decorations with seashells, sea glass, beach rocks, and more. Articles ›
Coastal and Beach Décor Ideas:

Check out how some beachcombers incorporate their love of seashells, sea glass, beach rocks, and more into their home décor. Articles ›
Quick note: We sometimes provide links on the Beachcombing website to make it easy to find or purchase products, some of which are on Amazon.com. As an Amazon Associate, we may earn from qualifying purchases made when you click and make purchases on Amazon, but please feel free to purchase items wherever it works best for you.


